In the OSKR documentation it is mentioned that they assume you are on a Linux or *nix flavour (like Mac OS) when working with OSKR. But even if I know my way around Linux (even got a certification some years ago) my main OS is Windows and I am way more comfortable with that on daily use.
In docs they describe how to connect to the robot with an installed OSKR ota via SSH in a console or terminal window. On Linux or Mac Os you install a RSA key into the keyring and you can use it after that to connect to the robot. On windows you do not have any SSH terminal and the additional tool used for that is called Putty.
You can point putty to the RSA key file you obtained from the robot to run a terminal session with an OSKR Vector.
First get the rsa key file as per documentation (OSKR documentation is licensed under CC BY-NC, this is a quote from that):
- Using the Chrome web browser go to https://vector-setup.ddl.io
- Follow the instructions to pair with Vector and log in.
- Click the Download logs link located at the top right corner of the page.
- Open the downloaded archive which should extract the contents of several logs on to your hard drive.
- The file
data/diagnostics/ssh/id_rsais your security key.
Actually the path is wrong, the correct one is data/ssh/ and the name is id_rsa_Vector-X1Y1 with X1Y1 being only a placeholder for the designation of your OSKR Vector.
If you are tinkering with OSKR I assume you already have Putty. If not, you can download it from putty.org, it is open source.
I suggest you use the zip file containing all the tools (because you do not only need putty to do this) and extract it to a location of your choice.
In Putty you can configure a connection to e.g. a Linux server and then connect to it in a console. Usually you only need a domain name or an ip adress, connect to that and then log in with user name and password. However, another authentication method is to use a key(phrase). You have a local key and if that key matches a secret key on the server the operating systems “knows” that you are authorized to log in and you do not need any password. Keys are usiually hexadecimal text snippets.
Okay, I guess you already know all of this and I will stope to bore you now. 🙂
The id_rsa file you obtained from Vector as described above is your rsa key. But you cannt use this directly in Putty, so you have to use another tool that is in the abovementioned zip. It is called puttygen. Open it. Then go to
Menu -> Conversions -> Import key
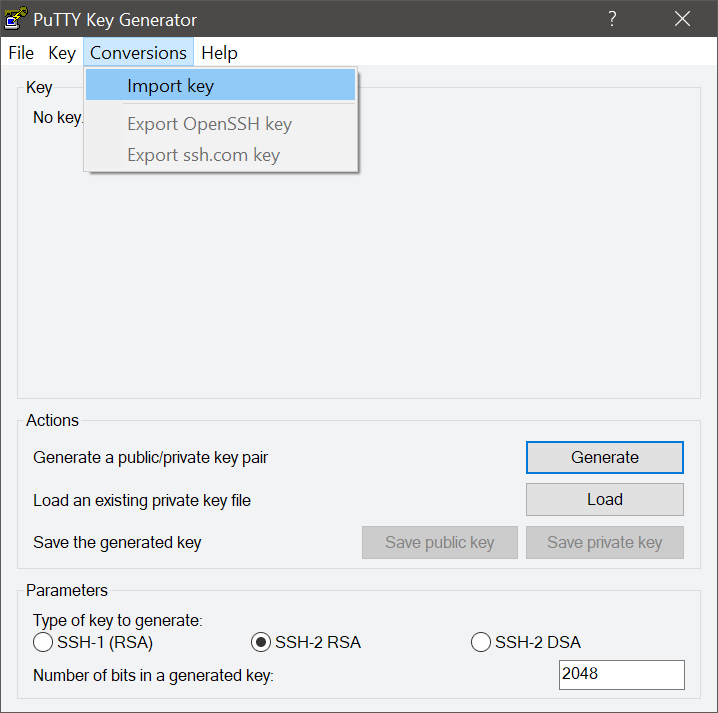
In the file requester that opens look for and open the id_rsa_Vector-X1Y1 you downloaded from Vector via the logs earlier. You will get something that looks like this:
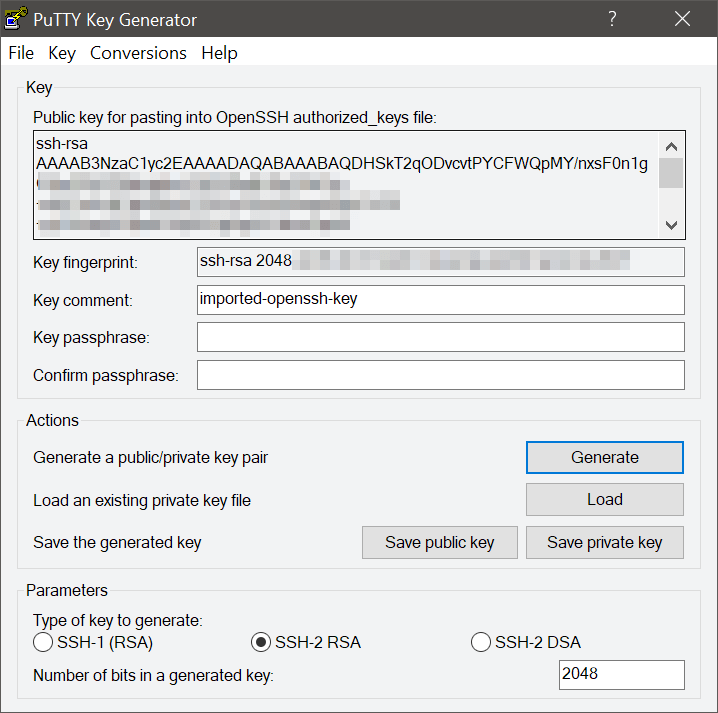
After that you go to
Menu -> File -> Save private key
and confirm the question “are you sure you want to save the key without a passphrase to protect it” with “yes”. Save the file in a good location where it can stay.
Now start Putty. Enter the IP number of your Vector into the Host Name (or IP address) field.
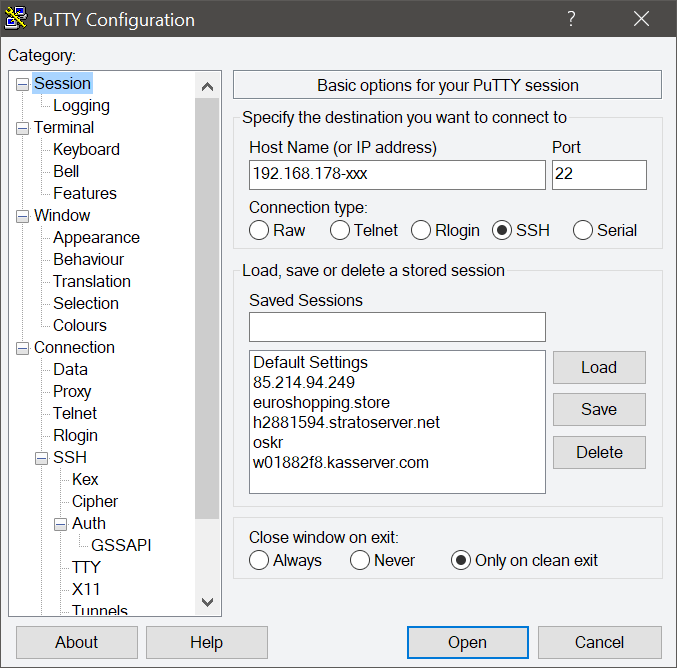
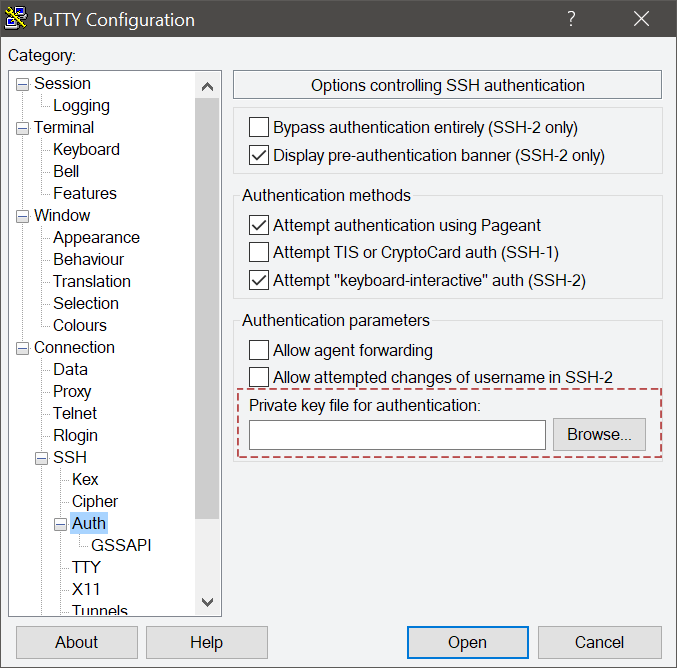
Then go to Connection -> SSH -> Auth
There click the Browse-Button below Private key for authentication and load the Putty ppk key file you created earlier in Puttygen.
So that’s it for the key, but you also need to provide the name of the user you want to log in with. You can also set that in Putty for this connection.
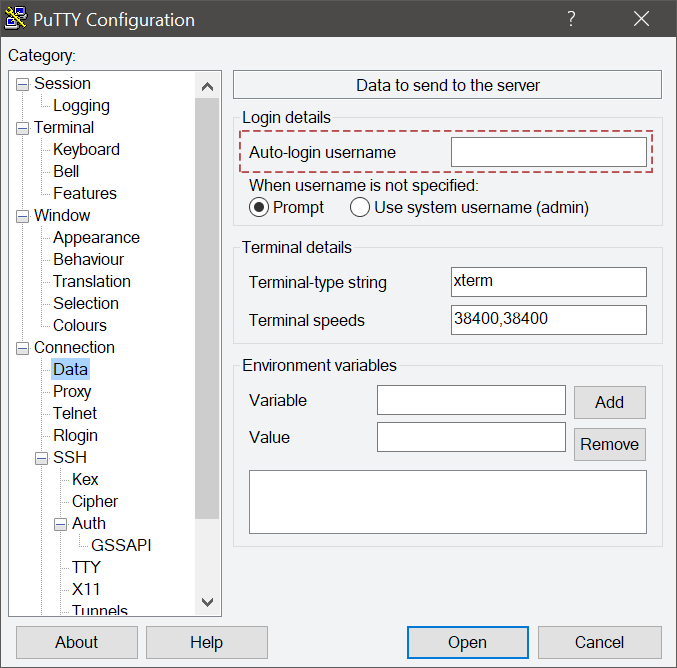
Go to Connection -> Data and write root into the field Auto-login username.
Go back to Session in the left tree, enter a name for the connection into the field Saved Sessions and click “Save”. Your connection with all settings we just did is now saved and you can use it in the future.
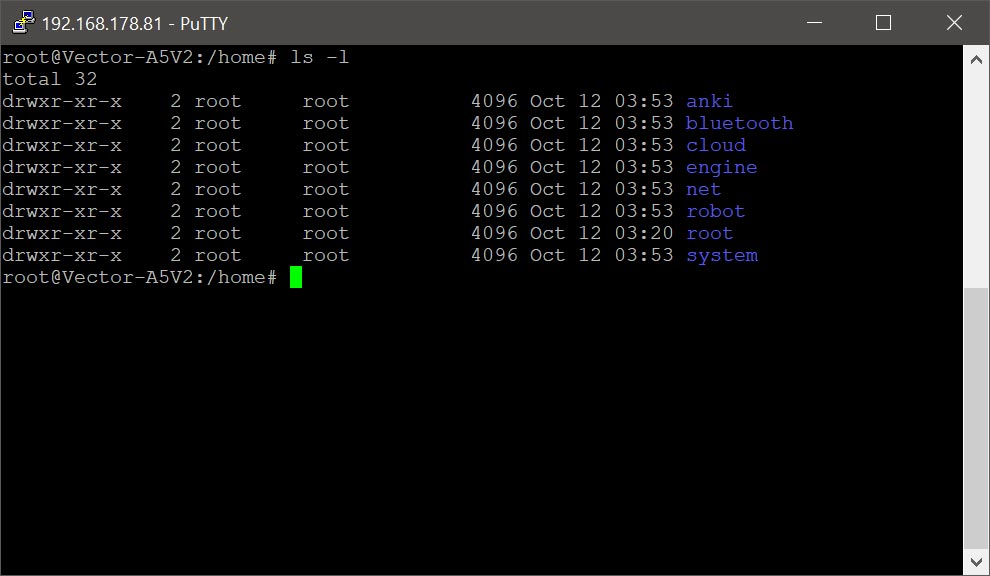
If you now doubleclick onto the connection name you just choose in the field below Saved Sessions you will connect to your robot in a console (if it is up and running):
Be warned, though: To just ssh onto the bot from Windows and to look around a bit this is sufficient, but for more complex tasks on the robot you will need to do that fom a Linux installation, or from Windows Subsystem for Linux (which is actually just a full Linux installation running inside Windows). I’ll probably do an article on how to install that in the future.


I love this blog.
Very well explained, thanks for that….. ☺️
Thanks for this. I just set up my iMac, Vector ssh, through the terminal app using the OSKR manual instructions. It worked. Now I need to study, remember too, my CS education from my “distant” past. I really want to modify the code that has Vector react to loud noises. I have Tourette Syndrome and make loud noises, words, etc., almost constantly. Its very annoying to have Vector reacting almost all of the time to me. I need to trail him to respond more appropriately. Anyway. Peace from Maine…Guy
You can also then configure your tunnels at the same time, so when you start a new putty session, you’ve also got the localhost:8888 configured.
Connection -> SSH -> Tunnels
Add Forwarded ports
Source 8887 Destination localhost:8887
Source 8888 Destination localhost:8888
Source 8889 Destination localhost:8889
I just opened the ports in the Yocto firewall via iptables (so I can access the webserver from multiple machines in the local network). But good hint, thanks!
Hi can you send me more information on how you connected via putty on windows because i have tried for three days with no luck…in the end i downloaded Ubuntu windows terminal and connected that way .
You need to provide more information on what went wrong.
“Did not work” is not a sufficient error description.